So, I thought I’d share a video a friend of me recorded while we where on our FPV trip.
There is also a exciting crash in the end!
my little blog

Category : RC
So, I thought I’d share a video a friend of me recorded while we where on our FPV trip.
There is also a exciting crash in the end!
Category : RC

I remember back some time when SimonK had some sync issues with some NTM motors, but that got sorted out quickly by Simon. So I have not really thought much about it till recently when I was going to build me a small fpv quad.
It seems like high pole count motors are especially prone to develop sync issues. This caught my attention since my new quad are going to use some 2204 size sunnyskys with 16 pole count, which is considered a high count (some say more than 12 is). So I dug around the forums and found this thread which several users are experiencing everything from sync issues to burnt motors.
bickie @ rcgroups: I noticed when running this motor it stutters when running (all other motors are fine on the same ESCs – HK F10A + SimonK)
It seems like several user are experiencing the same problems using the Hobbyking F10 esc and simonk. After some more reading it become quite clear it isn’t the ESC itself, but the firmware. The bottom line is to change to BLHeli, so it seems for now. Since it’s most likely a firmware issue I guess it isn’t long time until Simon fixes it. BLHeli also supports the popular Afro ESC series from hobbyking now!
sskaug the developer of BLHeli wrote this great article explaining the sync issues! Read it. You might also be interested in my guide for flashing BLHeli. It’s the same principle for all ESCs except you need to change to the corresponding .hex file.
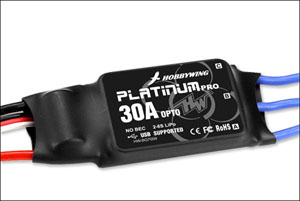
If you’re not into flashing there is a alternative, the Hobbywing Platinum series. They are special designed for multirotor use, might be worth checking out if it seems interesting.
Category : RC
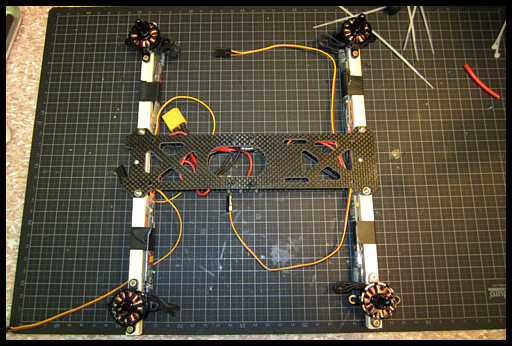
The 250 size FPV quads are getting more and more popular, and with good reasons. They are very handy in size, and quite capable. So of course I had to build myself one. There are many finished frames to choose from, some pricey and some not. But I went with the solution that gives most bang for the bucks imo. The 3 layer carbon frame from HK in combination with wooden arms.
Parts List:
I think that summons up the main parts, of course there are stuff thats not listed like screws, nylon standoffs etc etc. The reason I made the feet 270mm are because of the props reaching the frame if I made em 250mm. Mostly because I mounted the motors using the cross, this way I loose around 1 cm. If I had used aluminium arms I could have use M3 screws from inside the arms.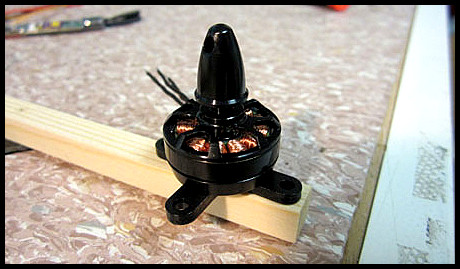
Since a regular power distribution board couldn’t fit I had to come up with some alternative. The solution was a piece of copper sheet, which I cut two thin strips from. Should hande my amperes nicely:
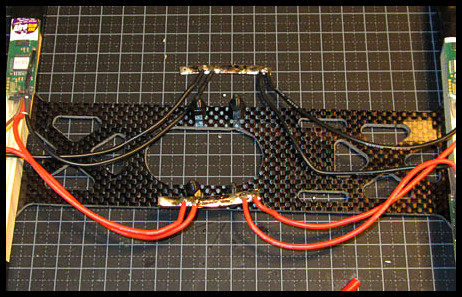
Well, after soldering on a JST and a XT60 connector I closed up my plates for now, I don’t think I need to open them up again, I can access most stuff from between the plates.
Category : RC
Tough I share a video of me and a friend racing our Troopers around. Two Turnigy Trooper 1/10 with 3S lipos.
I used a Mobius and a Innovv C2 for recording 🙂
Have fun watching!
Just a quick “tutorial” on how to obtain RSSI voltage reading from you Lawmate. Lets just get started.
What you need:
* Lawmate RX
* Soldering Iron
* A few wires
Lets start by unscrewing all screws on the casing. There are a total of eight.
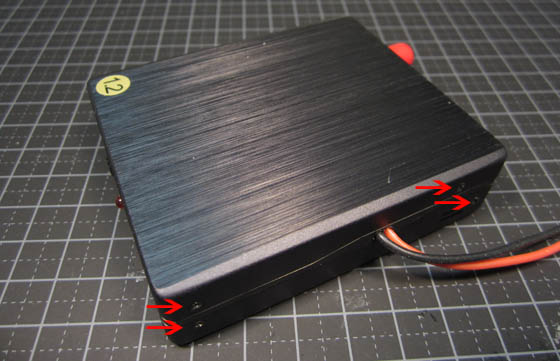
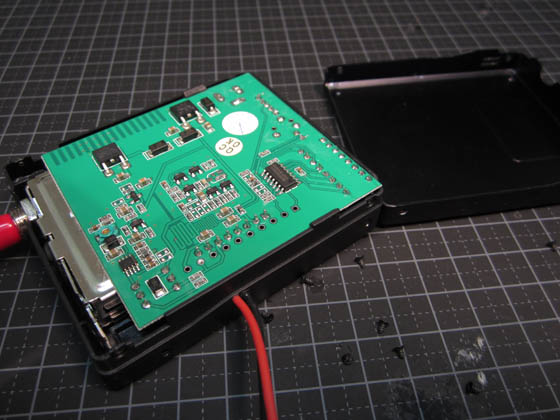
Gently take off the aluminium casing, and lift the internals out. There are two plastic hooks, one on each side of the PCB that needs loosening while lifting.
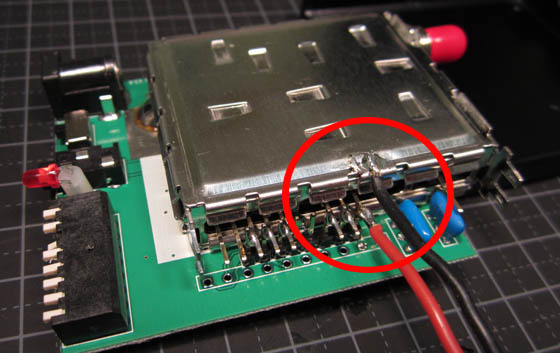
Solder negative wire somewhere on the shielding, and the plus wire to the last pin on the right side.
Close up the casing, and or drill some holes for you wires to come out. You will now be able to read the RSSI signal:
No Signal: 0.86 volts
Max signal around: 4,5 volts
Category : Electronics, RC
It’s really exciting how much the prices have dropped on brushless gimbal lately, and there are swarming with 70$ gimbals for gopro on ebay. I’ve seen some videos around youtube about their performance and it seems pretty good!
So I got around and ordered me one for testing, turns out it worked fine out of the box:
Great! I sold that gimbal to a friend and ordred me a new one, why not? They are working out of the box. Only mount your gopro camera onto it and power it on! So I thought.
My second gimbal arrived in a different box, and after closer inspection it has a different layout on the PCB, it also has a micro usb instead of a mini usb. So what, I mounted my gopro and powered it up. Heres my results:
Listen closely, can you hear that cracking noise?
After several rounds of testing, I still get the same results. So I contacted my eBay seller and complained about it. Long story short, he is now sending me a new controller board. He also provided me with some manuals written in chinglish. They might come in handy, especially if you also are having trouble with one of these gimbals:
This new and exciting LRS system looks very promising.

It’s priced at around 150$ for a complete set, which includes a TX, RX, wires & antennas. I bought one set as soon as I’ve read some about it. Haven’t had the time to test it other than binding and seeing that it works. I also measured the output power to around 7-900 mW in LOW and 1400-1700m W in HIGH. The power consumption are a little bit higher than most other LRS systems, but IMO it’s not a big problem.
Range tests from users at rcgroups seems to be pretty decent, around 70 km in low power mode and with stock antennas.
Key Features:
Super high sensitivity as -115 dBm
RSSI output(analog buffered) in separated channel on the Rx side
Diversity
Frequency configurable from 410-510Mhz
Firmware upgradable
16 channels (using two RXs)
Handles any standard PPM stream
And the best of all, the devs are active on the rcgroups forum, they are also on skype and are very happy to help out there too.
Links:
Himodel.com – 133$ TX & RX
Royalway-tech – Makers of Rlink
Category : Arduino, Electronics, RC
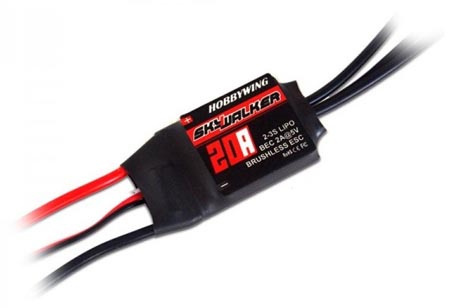
This guide will tell you step by step how to flash a Hobbywing 20A esc with BLHeli firmware for multirotors. It will be the same procedure for any other ESC with a silabs chip, you just need to find the pin-outs for it. Well lets get started.
You will need the following:
Arduino (UNO, Nano etc. I use a Mega 1280 in this guide)
Three wires (I used some male to female jumper wires)
Soldering-iron with a tiny tip
OlliW`s flash-toolkit
Step 1:

Attach your selected Arduino board to your computers USB and run the following file from the OlliW toolkit “AvrBurnTool_vxxx.exe”. Choose the type of Arduino board and select it’s COMport, then click the button “Burn All”. This will burn the flashing-tool onto your Arduino board, you can use your Arduino board for other sketches later, this will not make your board useless for other tasks.
A CMD window will popup and let you know the flashing is in progress and then done. Just close the AvrBurn tool and the CMD window. Lets move onto next step!
Step 2.
Remove the plastic wrapping around your ESC, and get familiar with the soldering points as show in the next picture (click on the picture to see a larger one).
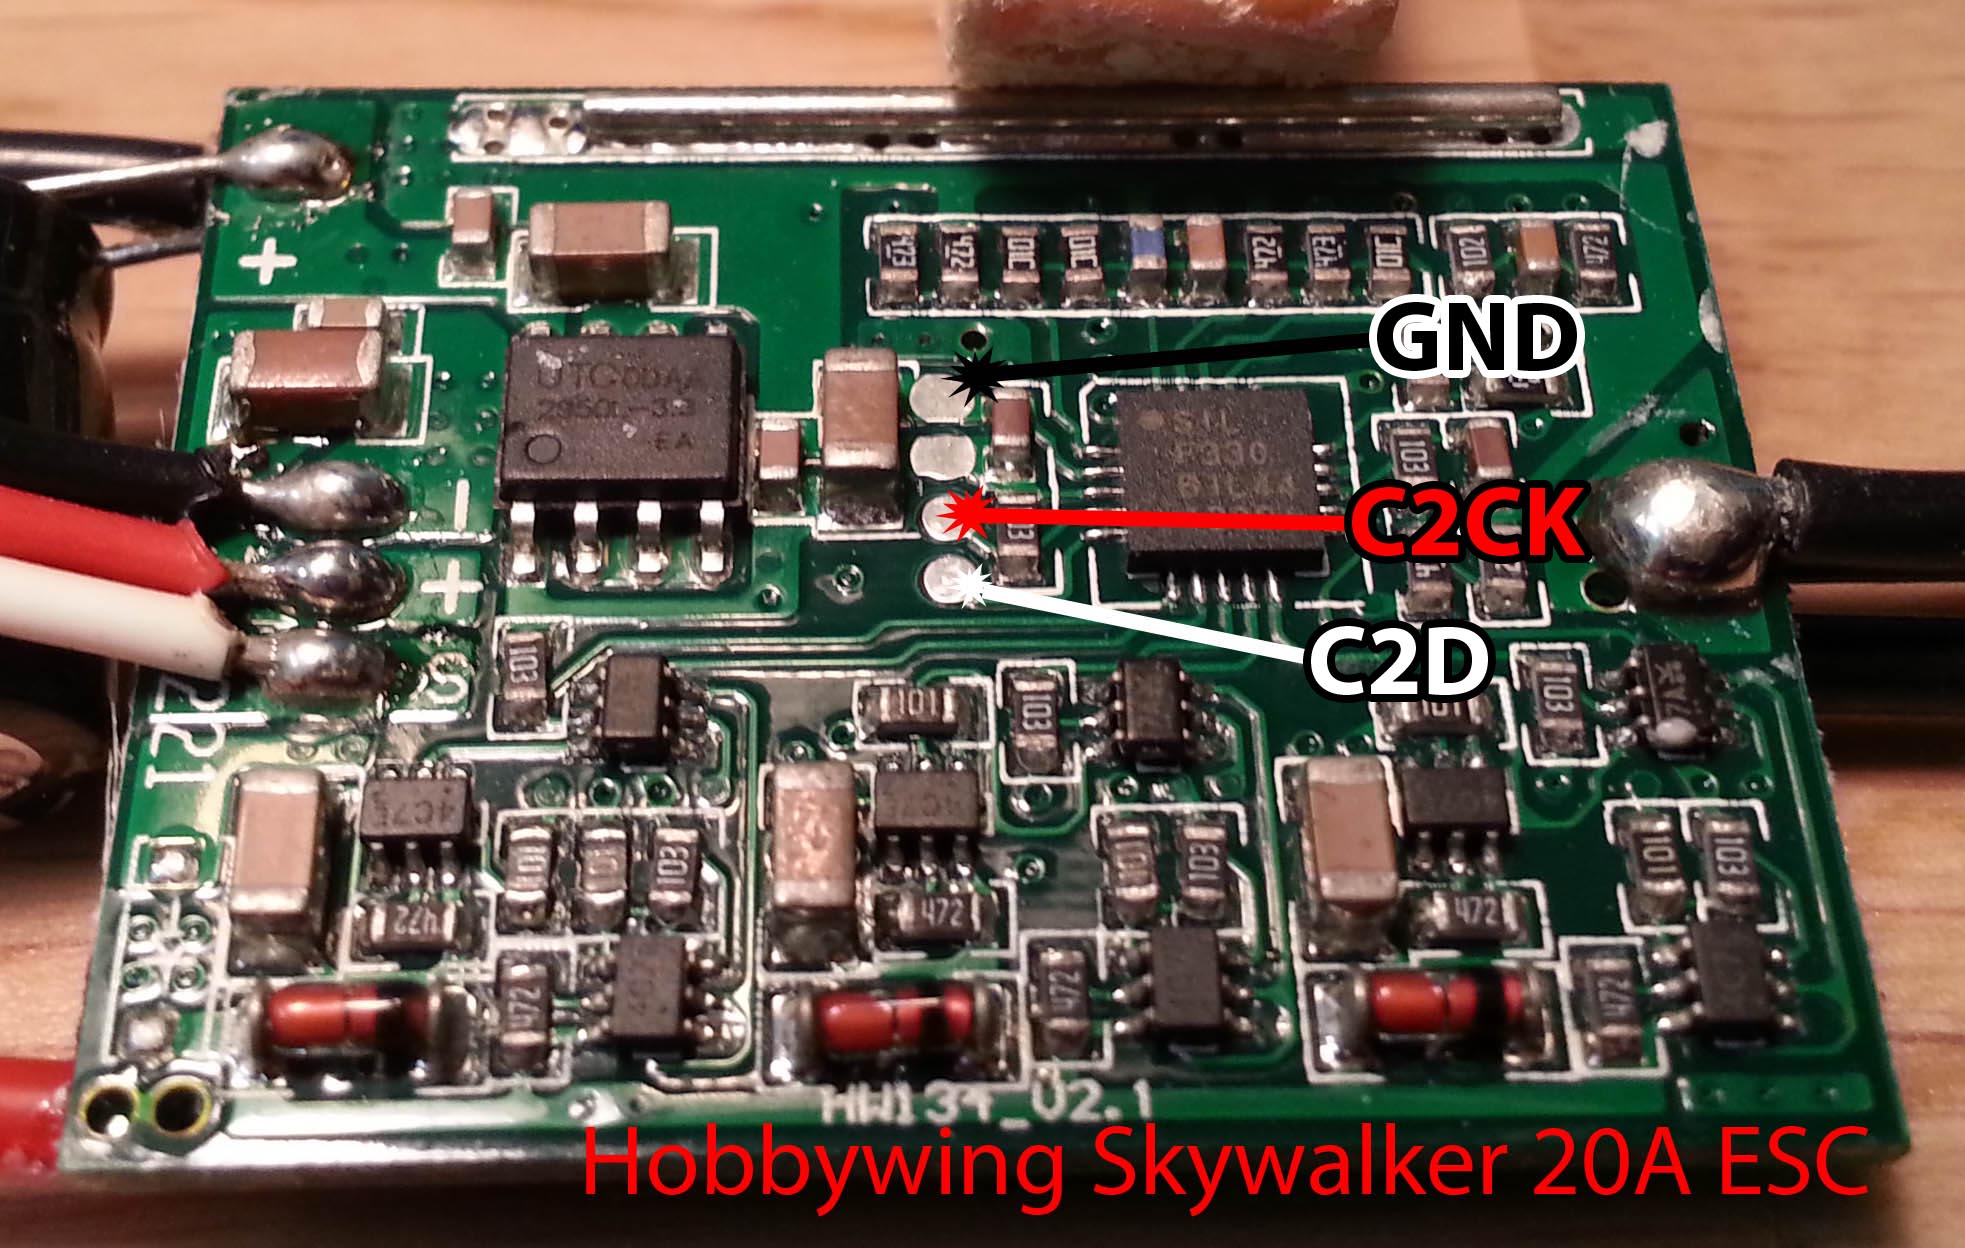
Now solder on the three jumper wires onto the pads shown in the picture above. The GND can be very tricky to solder, but after some try and fail I noticed it doesn’t need to be soldered exactly where the picture shows, but you can use the GND(black) at the servo-cable connection. Or generally any other GND. The red and white are easier, just put some tin on them first, then while you heat the wire, attach it!
It should look something like the picture below.

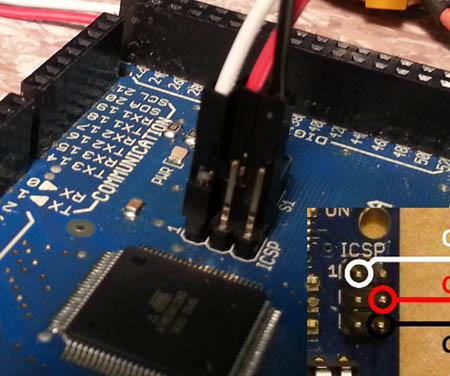
Then we attach the three wires onto the Arduino boards ISCP header, as shown in the picture below.
Step 3.
We are now almost ready to flash the ESC, but before we do so the ESC needs a lipo battery connected. Needs to be powered on while flashing. The start the file “BLHeliTool_v100.exe” and choose your ESC make, model, type. As shown in the picture below.

Or choose the firmware file directly “BLHeliHexFiles\SKYWALKER_20A_MULTI_REV9_3.HEX “, and hit Flash!
If everything went smooth it should say “Flash hex file… DONE!” 🙂 To verify this click the “Setup Basic” tab and select READ, this will tell you the firmware type.
HAPPY FLASHING!
PS! At the moment 9_3 firmware will cause “twitches” when used on the Skywalkers, a new fix is in the works. And will be released in a matter of days.
UPDATE: v10 firmware is now available, check out this link.
Category : RC
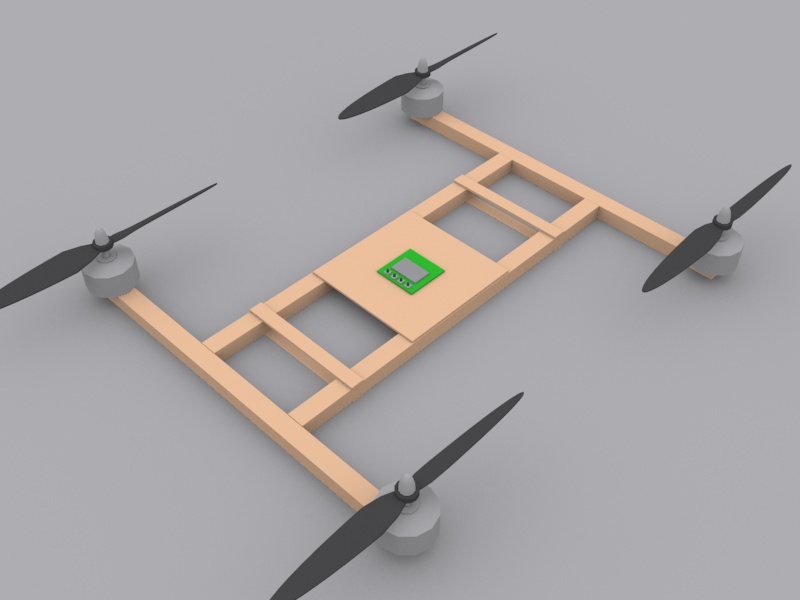
After some inspiration from fpv.no I decided to build my own H frame quadcopter.
It’s a very simple yet stable design, and makes a perfect FPV quad. The H quad gets a much larger “center” than most other types, which makes it spacious! You can fit almost anything onto it, well you’re only concern is the weight.
So I started off by drawing a simple 3D model of what I was looking for. I used 3dsmax, but for a quick model Sketchup is great. I’m jus more used to 3dsmax.
I bought some 18mm tick pinewood plates which I cut out cylinders in 20x18x800 mm sizes, then cut them down to their correct length.
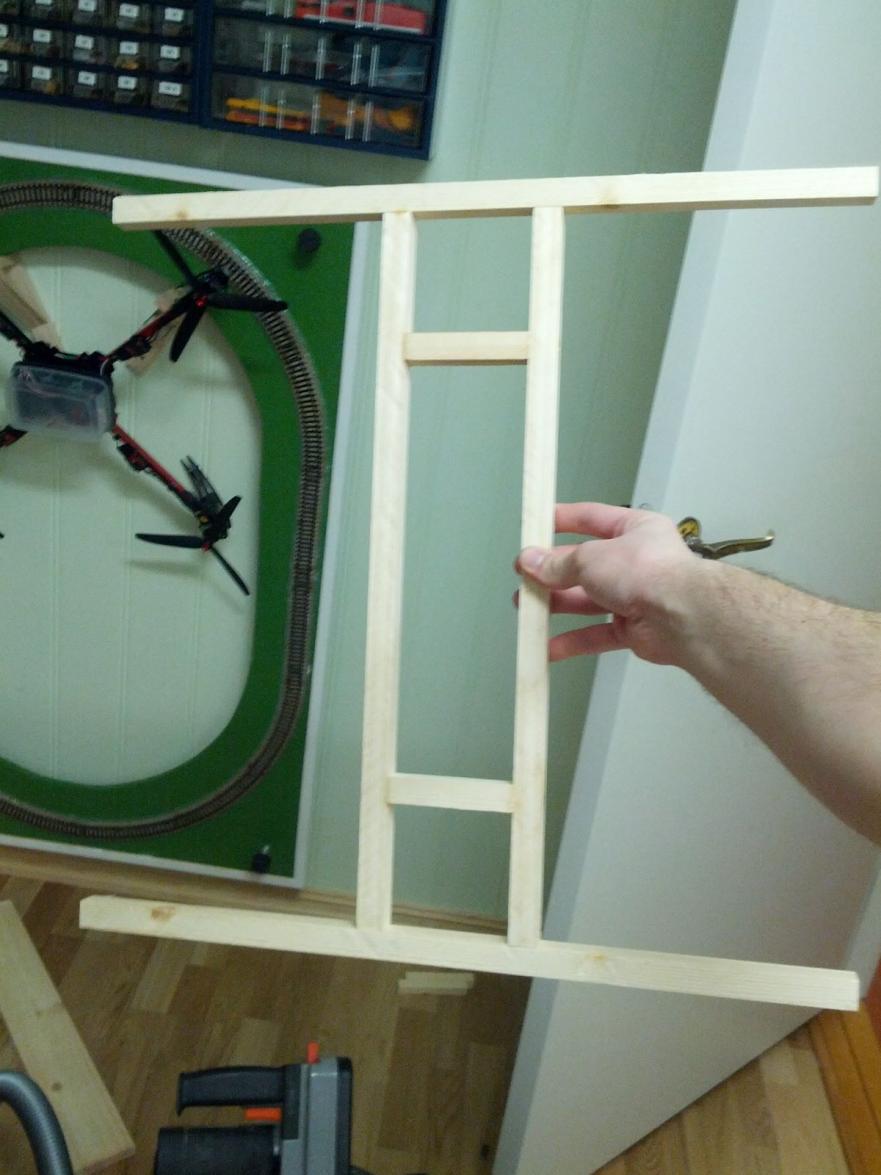
To make em stick together I used some small wood-screws and polyurethane wood glue between the joints. Making it surprisingly sturdy and stiff!
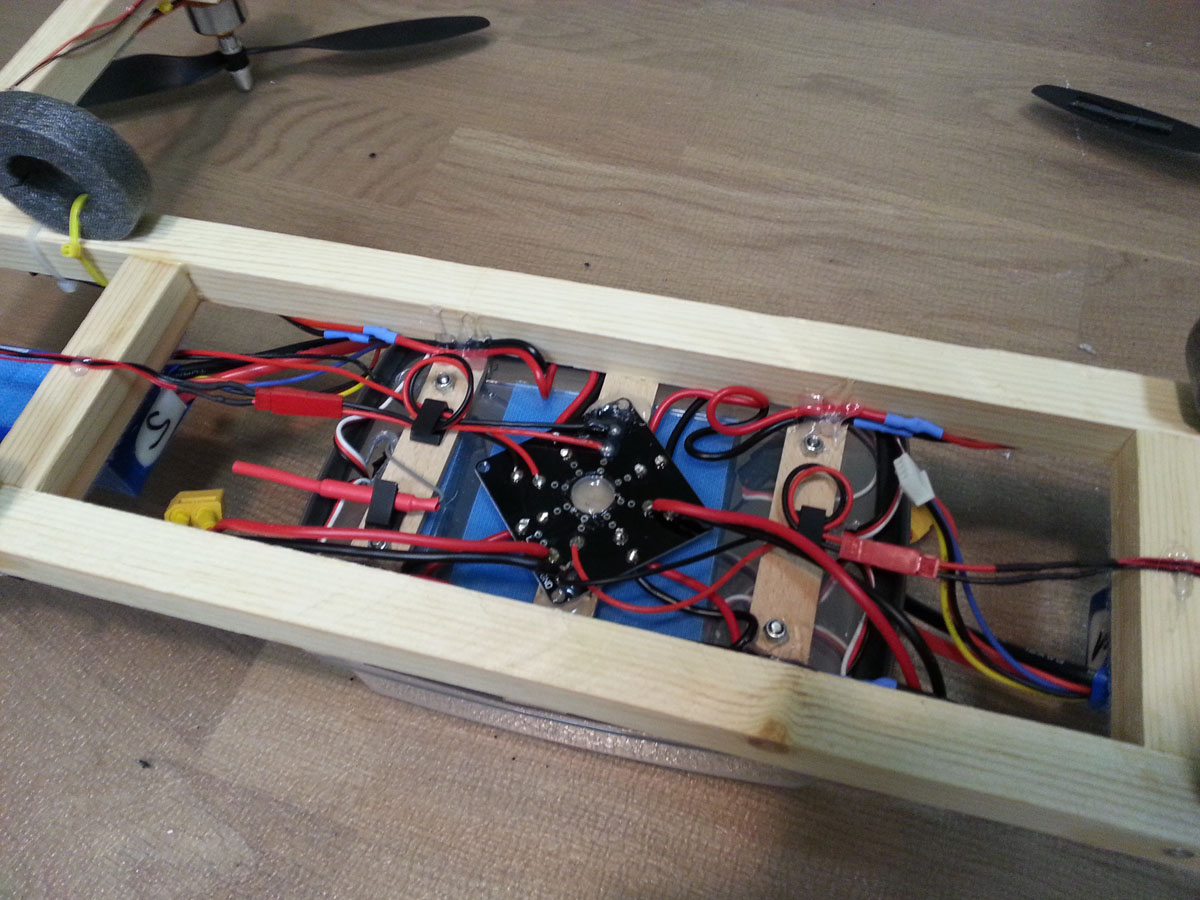
For soldering it all together I used a power distribution board, placed underneath the plastic box. For battery connections I use two XT60 plugs, one in front and one in back, to keep the quad in balance. Alternatively you could make room for the battery under the plastic box, making it possible to only fly with one large battery.
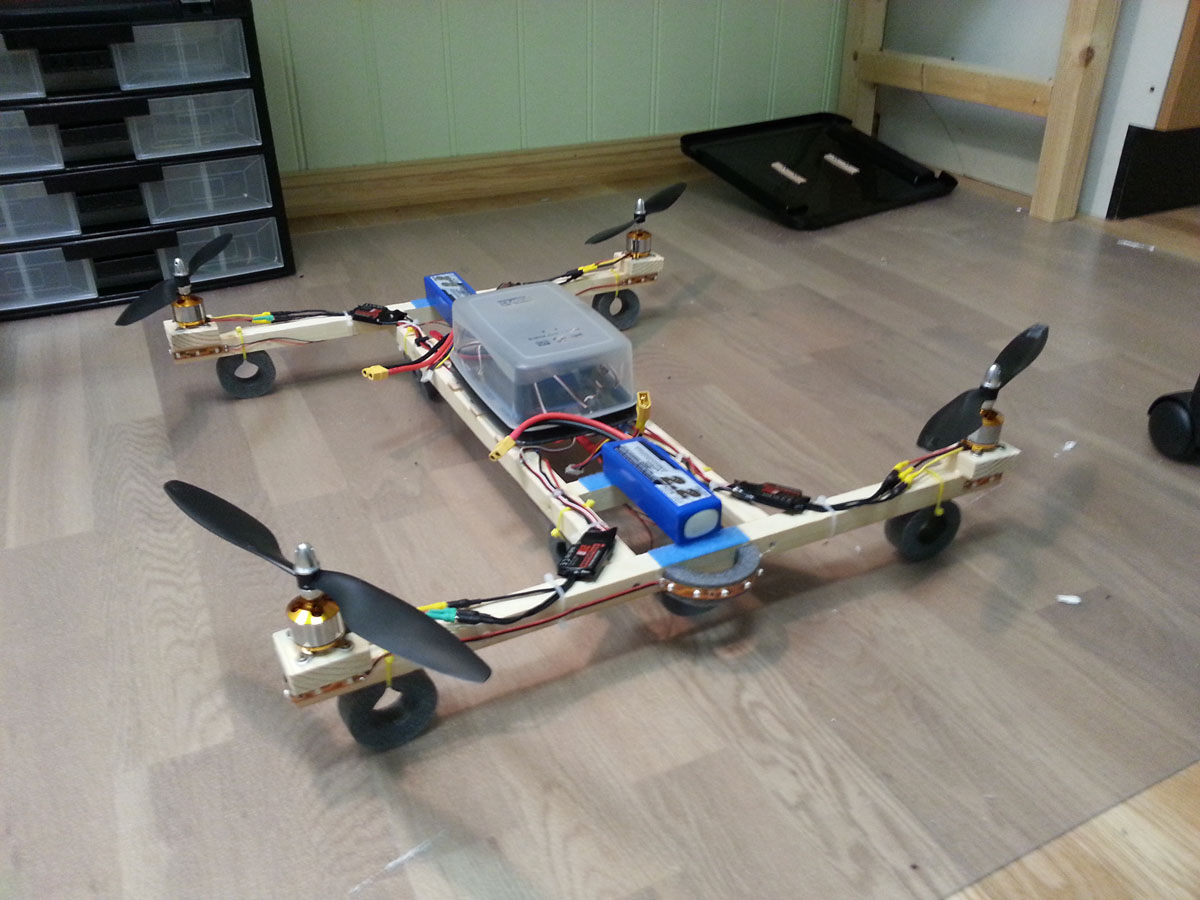
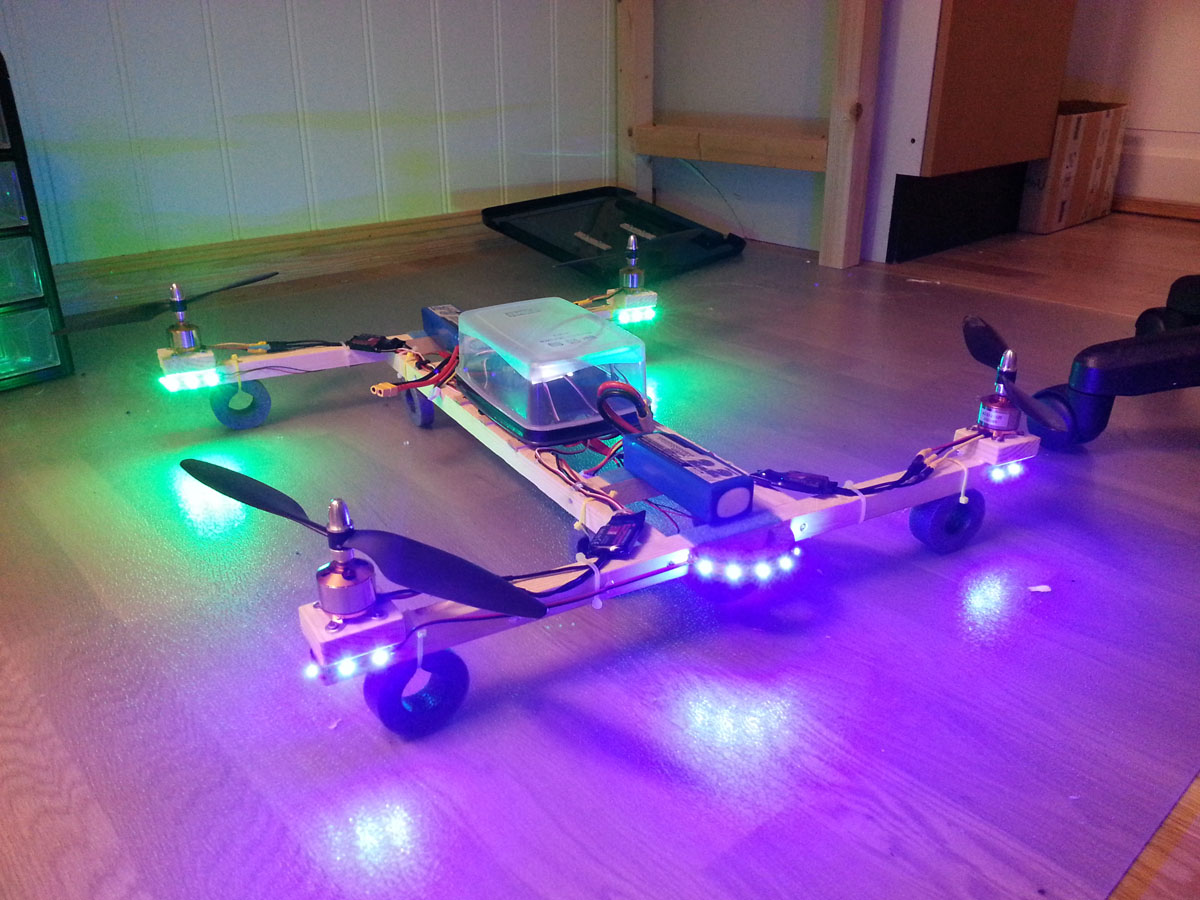
The end result looking like this! Total quad weight without battery: 1045 g
Parts list:
4x XXD A2212 KV1000 Brushless Motor
10×4.5 SF Props (comes in pack of four)
HobbyWing 20A ESC (found at eBay, RCtimer.com also has some nice ESCs)
Hobbyking Multi-Rotor Power Distribution Board
Hobbyking KK2.0 Multi-rotor LCD Flight Control Board
A 3S lipo of your choosing, I recommend 2x 3000 mah.
Nylon XT60 Connector for battery.
2x PolyMax 3.5mm Gold Connectors
Other parts:
Receiver of your choice, I use a Turnigy 9x with the 9x receiver.
LED’s? I bought the Turnigy LED’s from Hobbyking.
Feet? I used some tube-isolation foam.
Screws & Glue
Wood, pine or other equivalent.
Zip-ties.
Category : Electronics, RC

I just took the next step and ordered a real quadcopter, it is a ARF kit thats based on the x525 frame. The contents of the kit looks okay, and I guess for a first time build it’s just a good thing most parts already has been selected for me.
Kit Contents:
– X525 V3 folding frame*1
– KKMulticopter v5.5 *1
– XXD 2212 KV1000 brushless motor*4
– 3.17mm Shaft adapter*4
– GEMFAN Carbon Nylon 90×50″ 9050 9050R CW CCW Propeller *4
– Hobbywing 20A ESC*4
– ESC Connect Board*1
– Heat shink tube*12
– Not assembled,just a kit
I will most likely not be using the KKMulticopter 5.5 board, instead I have a KK2 from Hobbyking on it’s way. It looks much easier for a newbie to understand and setup. As some extras to the kit I also got a few extra props, one screw set, prop savers. I also ordered one extra frame kit!
The receiver I’m gonna use is the Turnigy 9x, and for powering this quad I will be using the lipos listed under here. Of course I will not use both at the same time, but I thought I’d give it a shot with different C ratings and mAh:
http://www.hobbyking.com/hobbyking/store/uh_viewItem.asp?idProduct=18207
http://www.hobbyking.com/hobbyking/store/uh_viewItem.asp?idProduct=26453
I’ll try to update this blog with a build log.
