Arduino, LEDs that blinks to the Music!

3

Category : Arduino, Electronics

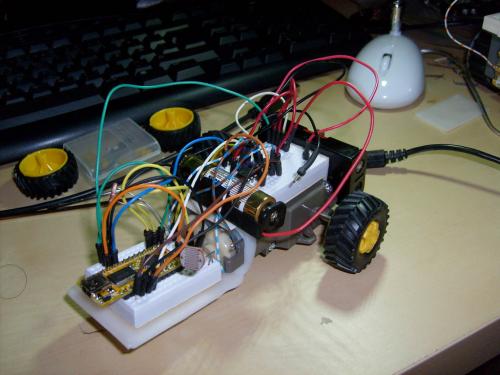
I always wanted to make something out of the microphone sensor I got, it’s just been laying in a compartment-box until recently when I got the idea of a music beat blinker.

Basically it just reads the analog value from the mic and converts it to a 0-1023 value, but since the microphone sensor I got is meant for 12 volts, it only ranges from 0 – 5-600 on 5 volts. But it works just as good, only it’s not as sensitive as it should be. When playing music that is never a problem hehe.

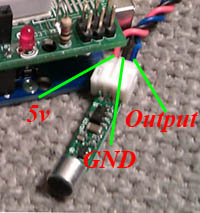
The microphone sensor I use is one I found on eBay some time ago, just search for “Arduino Sound Sensor Module” they cost around 5$. And are very easy to use, only ground it and feed it with 5 volts and stick the output to a analog input on the Arduino. I’ll also post the program code for the Arduino, it’s the same thats used in the video below. If you want to make something like this yourself using my example, you only need 5 LEDs or more. And just wire them to the digital pins 2-5, and of course the mic to analog 0. Code example can be found in the bottom of this article.

Here is a video showing the LEDs blinking to the music.

Program code example:


My Arduino Robots

Category : Arduino, Electronics

Thought I write some about my two robot projects! They both use a Modified Pico, since it’s the smallest Arduino I’ve found. And it also fits on a small breadboard!

Botty 2:

This is the most advanced robot I’ve built, but it’s not nearly finished.

It’s current task is to drive straight forward until it senses a object with it’s IR-sensor, then drive away from it until it’s cleared, and continue in that direction. Really simple 😛

It uses a Sharp-IR sensor, mounted ontop of a servo, so it scans the horizon while driving forward. The sonar in the picture isn’t in use, since I actually like the IR sensor better.

[youtube=http://www.youtube.com/watch?v=pscYXg-Rkp0;ap=%2526fmt%3D18&w=425&h=344]

BewBit:

Simple and yet fun to make arduino bot. Just follows the strongest light source. Using two LDRs, a modified pico and 1xAA and 2xAA battery packs, to give out 4,5 volts. Just enough to power theSN754410 and motors. But it gets around. It also includes a low-voltage alarm, which beeps when the voltage goes low.

Had a little accident, it drove over a carpet, or it came about 30cm into it and some funny gear-whining noise came 😛 A lot of hair in the gearbox, had to take it apart and clean it.

Future plans:

* Crash sensor, a small micro switch in front.
* Speaker, plays sound according to light source 😛
* Better code

[youtube=http://www.youtube.com/watch?v=kRqkj8t63pA;ap=%2526fmt%3D18&w=425&h=344]

Arduino: Showing CPU load with 9 leds!

6

Category : Arduino, Electronics

My new project, is a simple led-strip which shows CPU load. 9 led’s are used for this, could have used more but my tiny breadboard couldn’t hold more. Anyhow, it uses serial communication to receive how much the totalcpu usage is. For this you need a C# program running on your computer, it just sends a value from 0-100. And the Arduino reacts and lights up leds accordingly to how much load your CPU got.

I will not go into how you make the program in C#, therefore I’m uploading the .exe here for you to download. I’ll also include the source-code for it.

What you need?

1x Arduino
9x LEDs
Some wires

1. Wire it all up like in this Fritzing picture.

2. Load up the Arduino with the following program.

3. Download the C# program here.

When you start the .exe file, you only need to select which Com port the Arduino is using. And the click connect, and then it should start communicating with the Arduino. And show cpu load.

[youtube=http://www.youtube.com/watch?v=ecbdUhiOWes&w=425&h=344]

PS. If you got any questions etc, please take it in my forums post here.